Annual water monitoring steps for Swedish well owners
TL;DR:
- Swedish private well owners are responsible for regular water testing due to lack of government monitoring.
- Annual microbiological testing and chemical assessments are vital to ensure safe drinking water.
- Proper sampling, accredited labs, and responsive testing adapt to changing well conditions protect health.
In Sweden, no mandatory government monitoring exists for private wells, meaning the full responsibility for your family’s drinking water sits entirely with you. That’s not a small thing. Contaminated well water can look, smell, and taste completely normal while quietly carrying bacteria, nitrates, or radon that cause real harm. The good news is that a clear, repeatable annual monitoring routine makes it manageable. This guide walks you through every step: why regular checks matter, what you need, how to sample correctly, and what to do when results come back.
Table of Contents
- Why annual water monitoring is essential for Swedish well owners
- What you need: Tools, test kits, and prerequisites
- The step-by-step water sampling and testing process
- Interpreting your results and next actions if problems arise
- What most well owners overlook about water monitoring
- Get reliable water testing and expert support
- Frequently asked questions
Key Takeaways
| Point | Details |
|---|---|
| Every owner is responsible | Swedish private well owners must test and ensure their own water quality and safety. |
| Test for the top risks | Focus on key risks like bacteria, nitrates, PFAS, and radon with annual microbiological testing. |
| Use accredited labs only | Always use Swedac-accredited (ISO 17025) labs and proper kits for reliable results. |
| React quickly to problems | If water is unfit, stop use, investigate, treat, and retest until safe. |
| Go beyond the routine | Adapting your monitoring in response to events and risks is essential for true safety. |
Why annual water monitoring is essential for Swedish well owners
Sweden has over 700,000 private wells, and the numbers behind them are sobering. Research shows that roughly 20% of Swedish wells contain water that fails to meet safe drinking water standards. That means one in five families could be unknowingly exposed to health risks every single day.
The threats are not just one type. They fall into three broad categories:
- Microbiological: E. coli, coliforms, and enterococci are the most common culprits. They enter wells through surface water infiltration, faulty well casings, or nearby sewage.
- Chemical: Nitrates from farming runoff, PFAS from industrial or airport sites, arsenic from bedrock, and elevated iron or manganese are all documented in Swedish groundwater.
- Radiological: Radon is a serious concern in granite-heavy areas like Värmland, Dalarna, and parts of Bohuslän. It is odorless, invisible, and hazardous at elevated concentrations.
“Groundwater quality is not static. A well that tested clean three years ago can fail today due to changes in land use, weather patterns, or the well structure itself.”
The recommended baseline is annual microbiological testing paired with a full chemical assessment every three years. However, that schedule is a minimum. Vulnerable households, including those with infants, elderly residents, or immunocompromised family members, should test annually across all parameters without exception.
Your location matters enormously when planning your monitoring. If your property is near agricultural land, prioritize nitrates, PFAS, and pesticides. If you sit on or near granite formations, radon is a primary concern. Coastal properties may face saltwater intrusion. These water analysis facts help you tailor your testing scope rather than guessing.
Understanding the importance of regular water testing also means recognizing what you cannot see. Many chemical contaminants have no odor, color, or taste. The only reliable way to know is through lab analysis. Trusting your senses alone is one of the most dangerous assumptions a well owner can make.
With the risk clearly outlined, it’s vital to get familiar with what you’ll need before you start.
What you need: Tools, test kits, and prerequisites
Before you collect a single drop of water, you need the right equipment and the right lab. This is where many homeowners make their first mistake: ordering a cheap test kit online without verifying the lab’s credentials.
Only labs that hold Swedac accreditation (ISO 17025) are authorized to provide results that meet Swedish legal requirements. Results from non-accredited labs cannot be used for property sales, permit applications, or regulatory documentation. Start there, always.
Here is what a proper sampling kit should include:
| Item | Purpose |
|---|---|
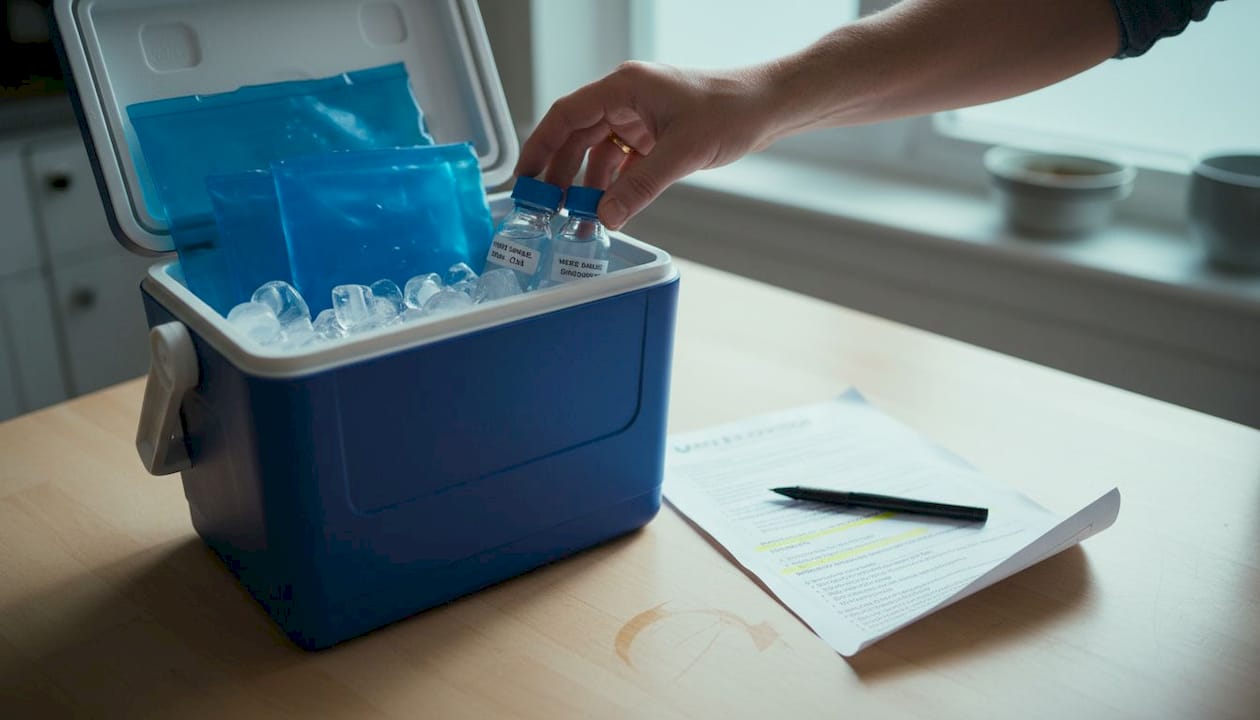
| Sterile sample bottles | Prevents contamination during collection |
| Cooler with ice packs | Keeps sample temperature stable during shipping |
| Disinfectant (70% ethanol) | Cleans the tap before sampling |
| Disposable gloves | Protects sample from hand contact |
| Prepaid shipping label | Speeds up lab delivery |
| Chain of custody form | Documents the sample for legal traceability |
The Livsmedelsverket private wells guide provides clear guidance on preparation. Read the water sampling instructions for your specific kit before the day of collection, not on the morning of.
Preparation steps before sampling:
- Remove aerators and filters from the tap you plan to use
- Do not use an outdoor tap or one with a hose attachment
- Flush the water line for 2 to 5 minutes to draw fresh groundwater, not stagnant pipe water
- Clean the tap with 70% ethanol and let it air dry before collecting
Timing matters too. Collect your sample early in the week, Monday through Wednesday at the latest. Labs typically need 1 to 2 business days to register your sample, and weekend arrivals often sit unprocessed. Delays affect bacterial culture results in particular.
Review groundwater statistics for your region before you order your kit. Knowing what contaminants are most common locally helps you select the right package and avoid paying for parameters that are irrelevant to your area.
Pro Tip: Write the collection date, exact time, and tap location on the sample bottle in permanent marker before you leave the house. This small step prevents mix-ups and is often required for chain of custody documentation.
With the essentials in hand, you’re ready for the most important part: sampling and testing.
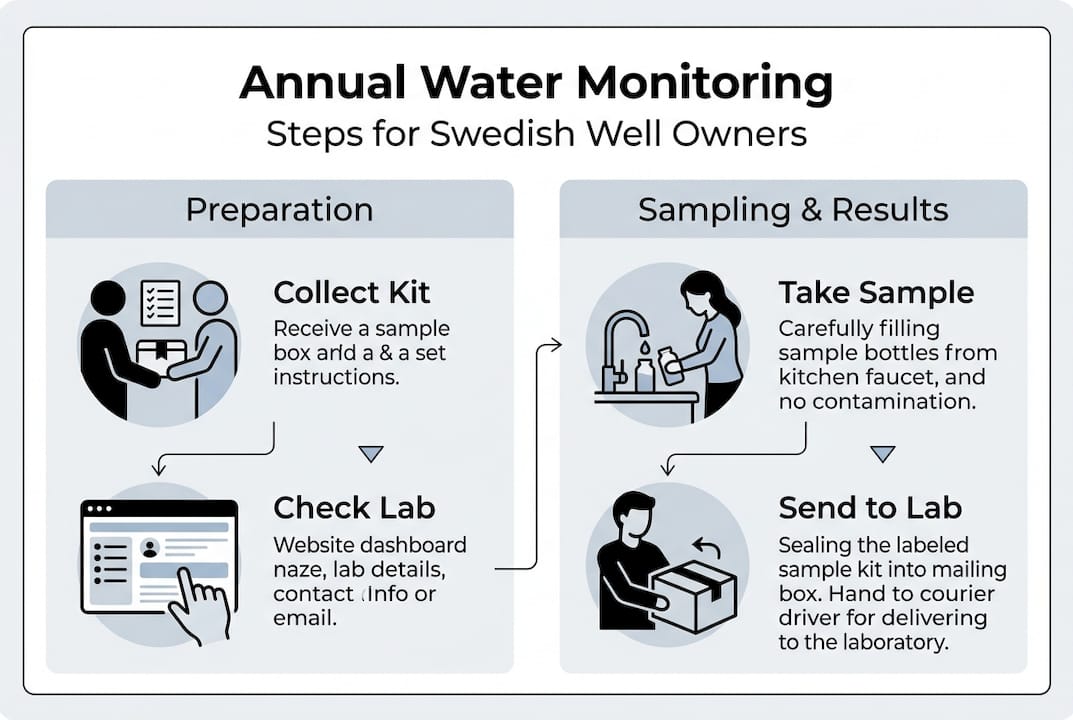
The step-by-step water sampling and testing process
Following a structured process is not just good practice, it is what SS-EN ISO 19458 methodology requires to prevent contamination and ensure lab-grade accuracy. Skipping or rushing any step can invalidate your results entirely.
- Assess your risk. Consider your well type, location, surrounding land use, and any recent events like flooding or repairs.
- Order your accredited test kit. Choose based on your well type and local risk factors.
- Clean and disinfect the tap. Use 70% ethanol spray, wipe thoroughly, and allow it to dry completely.
- Flush the line. Run water for 2 to 5 minutes. Do not flush longer if your well is shallow, as excessive flushing can introduce surface water.
- Fill the sample bottle. Open the sterile bottle, fill without touching the rim or inner cap, and seal immediately.
- Pack and ship cold. Place the sealed bottle in the cooler with ice packs. Attach the prepaid label and drop off at the courier same day.
Here is a quick reference for when to test and what triggers immediate action:
| Scenario | Recommended action |
|---|---|
| Normal annual monitoring | Standard microbiological test |
| Full chemical baseline | Every three years (or annually for high-risk) |
| After flooding or drought | Immediate retest, full panel |
| After well repairs | Immediate retest before resuming use |
| Suspected nearby pollution | Immediate targeted chemical test |
| Change in taste, smell, or color | Immediate full test |
Do not touch the bottle rim. Do not delay shipment overnight. These two errors account for most sample rejections we see.
Your lab report will typically arrive within 5 to 10 business days. Review the sampling instructions for any kit-specific handling notes before you begin.
Pro Tip: Photograph your sample collection setup, the tap before and after cleaning, and the packed cooler before shipping. If results come back unexpected, this documentation helps rule out sampling error quickly.
Once you’ve completed your water sampling and sent off your kit, you’ll soon receive your results. Here’s how to interpret them and what to do if there’s a problem.
Interpreting your results and next actions if problems arise
Your lab report compares each parameter against limits defined in LIVSFS 2022:12, the Swedish regulation from Livsmedelsverket that incorporates EU Drinking Water Directive thresholds. Every value will be marked as either acceptable or exceeding the limit.
If all parameters fall within acceptable ranges, document the report and schedule your next annual test. If any value is flagged:
- Stop using the water immediately for drinking and cooking. Do not wait for a follow-up test.
- Identify the likely source. Bacterial contamination often points to surface infiltration or a cracked casing. Nitrates suggest agricultural runoff. Radon indicates geological origin.
- Treat and remediate. Depending on the issue, this could mean UV disinfection, activated carbon filtration, reverse osmosis, or physical well repair.
- Retest before resuming use. One clean result is not always enough. Some contaminants require two consecutive clean samples to confirm the issue is resolved.
- Notify your municipality if the contamination is serious or if a shared water source may be affected.
“If your water is declared unfit, notify authorities and treat the source before resuming use. Documentation of every step protects you legally and practically.”
Always keep written records of every test result, every action taken, and every communication with authorities or contractors. This documentation is critical for insurance claims, property sales, and any future regulatory inquiry. Understanding quality standards for private wells helps you interpret what each parameter means for your household specifically.
You now have a full cycle from risk to results. But to go beyond the basics, it’s worth seeing what many guides miss about water safety.
What most well owners overlook about water monitoring
Here’s the uncomfortable reality: following the annual schedule is necessary but not sufficient on its own. We see homeowners who test regularly but still end up with contaminated water because the how of sampling was never taken seriously.
A sample collected from a poorly cleaned tap, shipped a day late, or stored at room temperature can return false results. A clean result from a flawed sample is arguably worse than a detected problem, because it gives false confidence.
Beyond technique, the bigger issue is treating water monitoring as a fixed ritual rather than a responsive practice. Your well’s risk profile changes. A new neighbor starts farming. A dry summer lowers the water table. Your well casing turns 30 years old. Each of these shifts the contamination probability, and none of them show up in last year’s results.
The homeowners we worry about most are not the ones who have never tested. It’s the ones who tested once, got a clean result, and assumed it would always be that way. Reviewing uncommon facts about well water can shift that mindset quickly. Treat your monitoring as a living process that adapts to what’s happening around your property, not just a calendar reminder.
Get reliable water testing and expert support
If this guide has made one thing clear, it’s that the right kit and the right lab make all the difference. Annual monitoring only protects your family when it’s done correctly, with accredited results you can actually trust.

At Svenskt Vattenprov, we make the process straightforward. If you want to start with microbiological safety, our bacteria testing kit covers E. coli, coliforms, and enterococci with fast, clear results. For full-scope annual and triennial monitoring, our complete water test package covers 71 parameters analyzed by SGS Analytics and Eurofins, a Swedac-accredited lab. Every report comes with plain-language explanations and actionable recommendations so you know exactly what to do next.
Frequently asked questions
What tests should be done every year for Swedish private wells?
Annual monitoring should cover microbiological parameters like E. coli, coliforms, and enterococci, plus basic physical and metal indicators such as pH and conductivity. A full chemical panel is recommended every three years.
What should I do if my well water fails to meet safety standards?
Stop using your water immediately, identify and address the contamination source, apply appropriate treatment, and retest before resuming use. Notify your municipality if the contamination is serious or could affect neighboring properties.
When should I test more often than annually?
Immediate retesting is required after floods, drought, well repairs, or if you notice changes in taste, odor, or appearance. Homes near farms or in granite areas with high radon risk should also consider more frequent checks.
Why do I need to choose a Swedac-accredited lab?
Only Swedac-accredited labs (ISO 17025) deliver results that meet Swedish legal standards, making them valid for property transactions, permit applications, and regulatory documentation. Non-accredited results carry no legal weight.